Kamis, 17 Juni 2010

Fire Lines

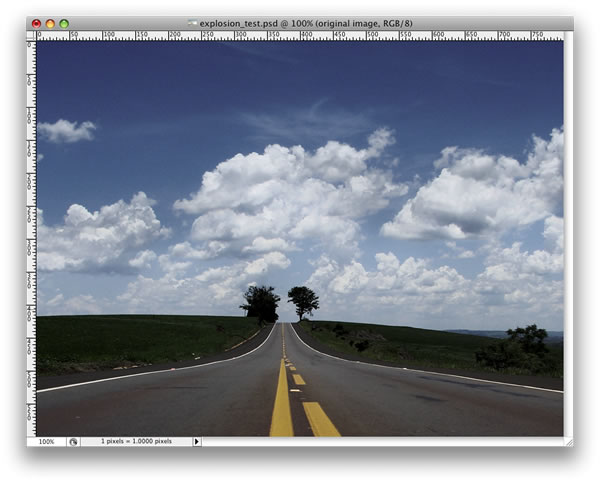
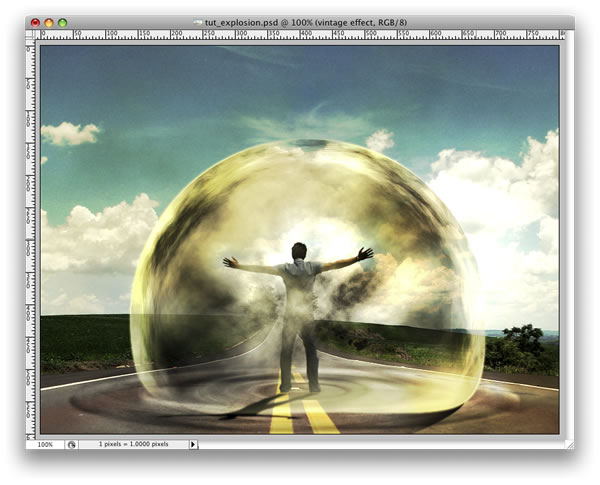
For this tutorial your going to need a good stock photo lined up. Something with action…and preferably dark (this effect works much better in a dark setting)

02

Open the stock photo, then go to the paths tab and click create new path.
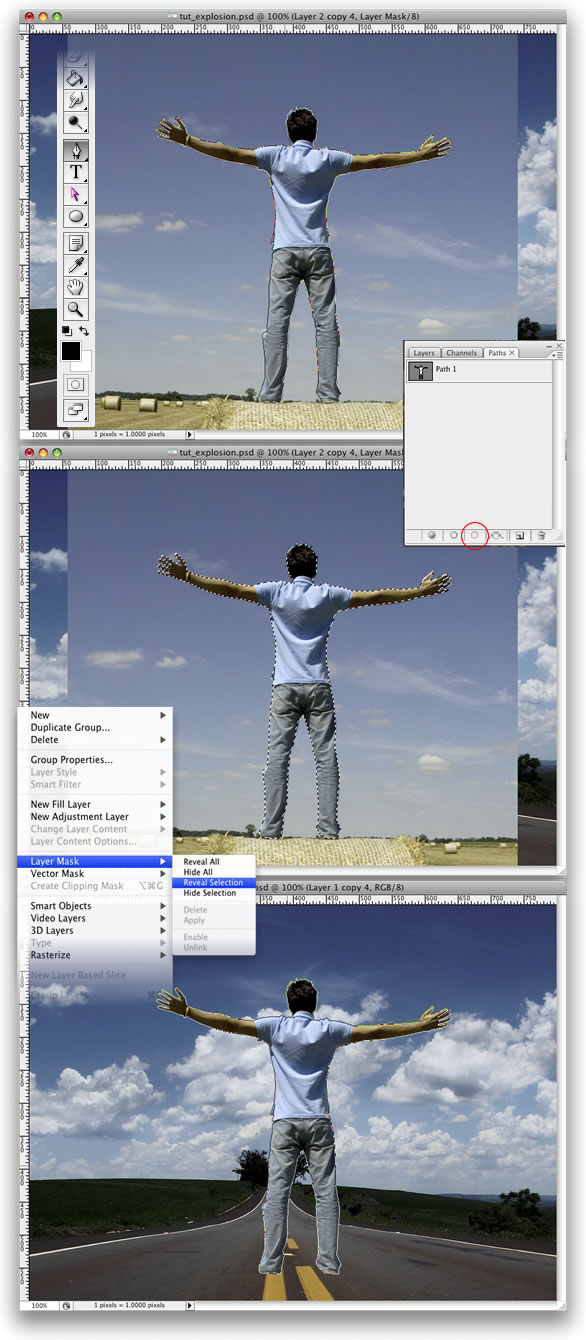
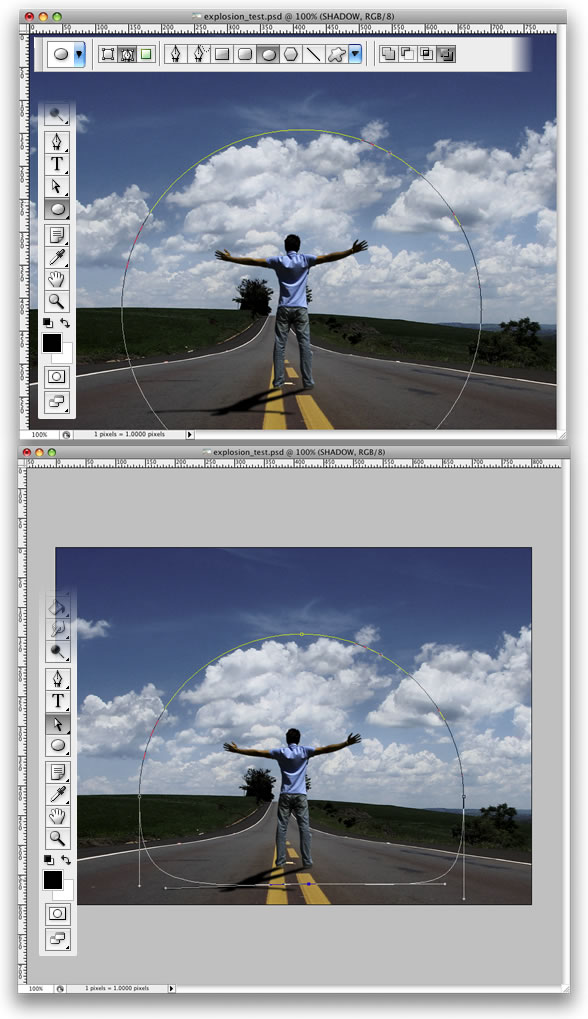
Press “P” on the keyboard to select the pen tool, Get a basic idea of where the fire is going. Keep in mind dimension and action. Swirls do wonders!

03

A. Click to start your path
B. Click your next point, hold and drag to create a bezier spline path, which is necessary to create flowing lines
C. Continue doing this, following the idea of where you want the fire to go.
Dont worry about getting it right the first time as you can change the spline at any time…another little tip - if you press and hold ctrl while using the pen tool you can temporarily access the direct selection tool which will allow you to edit the spline (a big time saver)

04

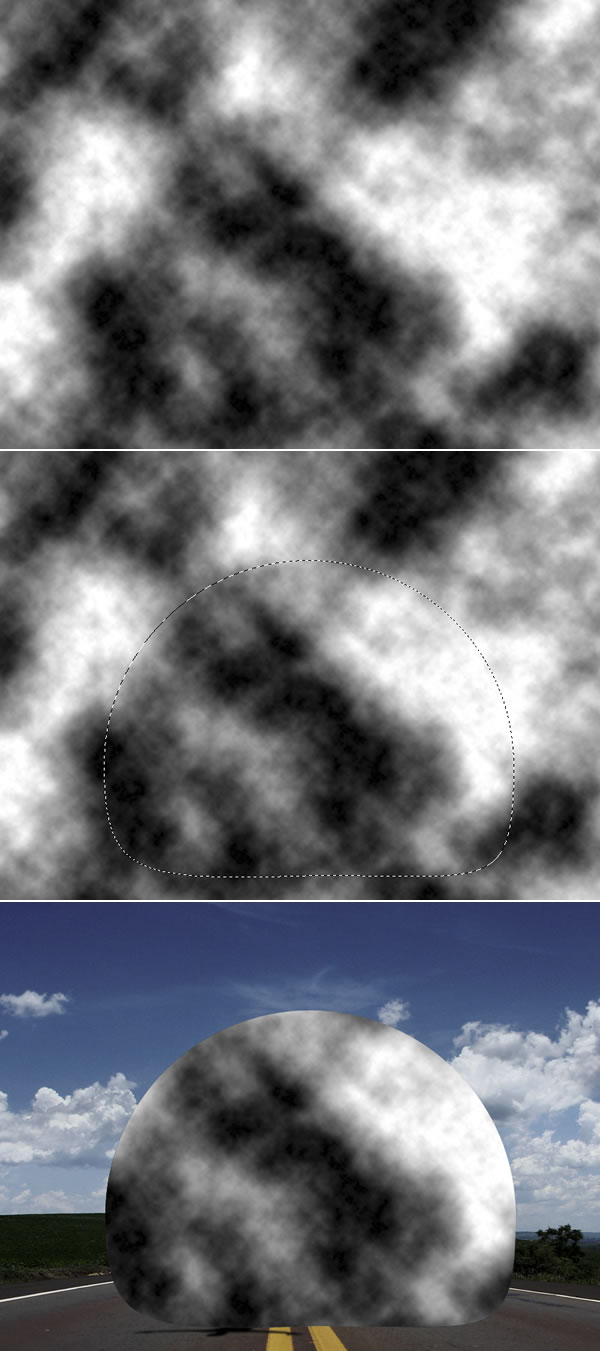
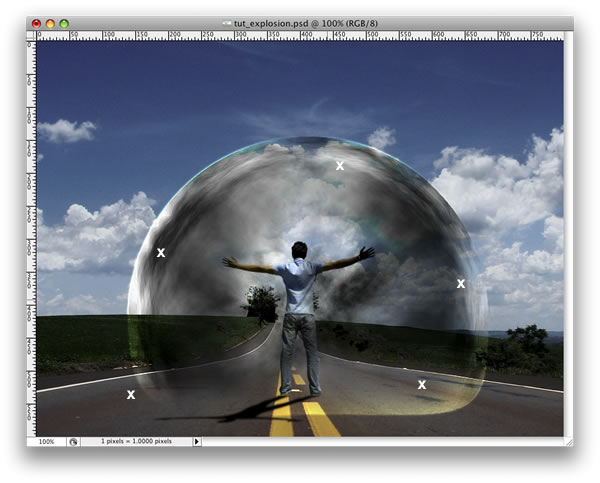
And eventually…you get something like what i have below. Remember that your only going to use the parts of your path that are in front of the object your path follows…in this case the models arm, and leg. So don’t waste time trying to make the hidden parts look pretty.

05

A. Now you want to select a soft round brush (i used a 5 pixel brush here) and pick an orange color.
B. Make a new layer and name it Fire.
C. Go back to the paths tab and select stroke path with brush.

06

You should immediately see the stroked path.
On mine you’ll see splatters and flairs that weren’t part of the original path. Those give the fire line the illusion that it is moving, and were accomplished by simply grabbing the clone stamp tool - using a spatter brush and cloning/stamping areas of the path at random.
07

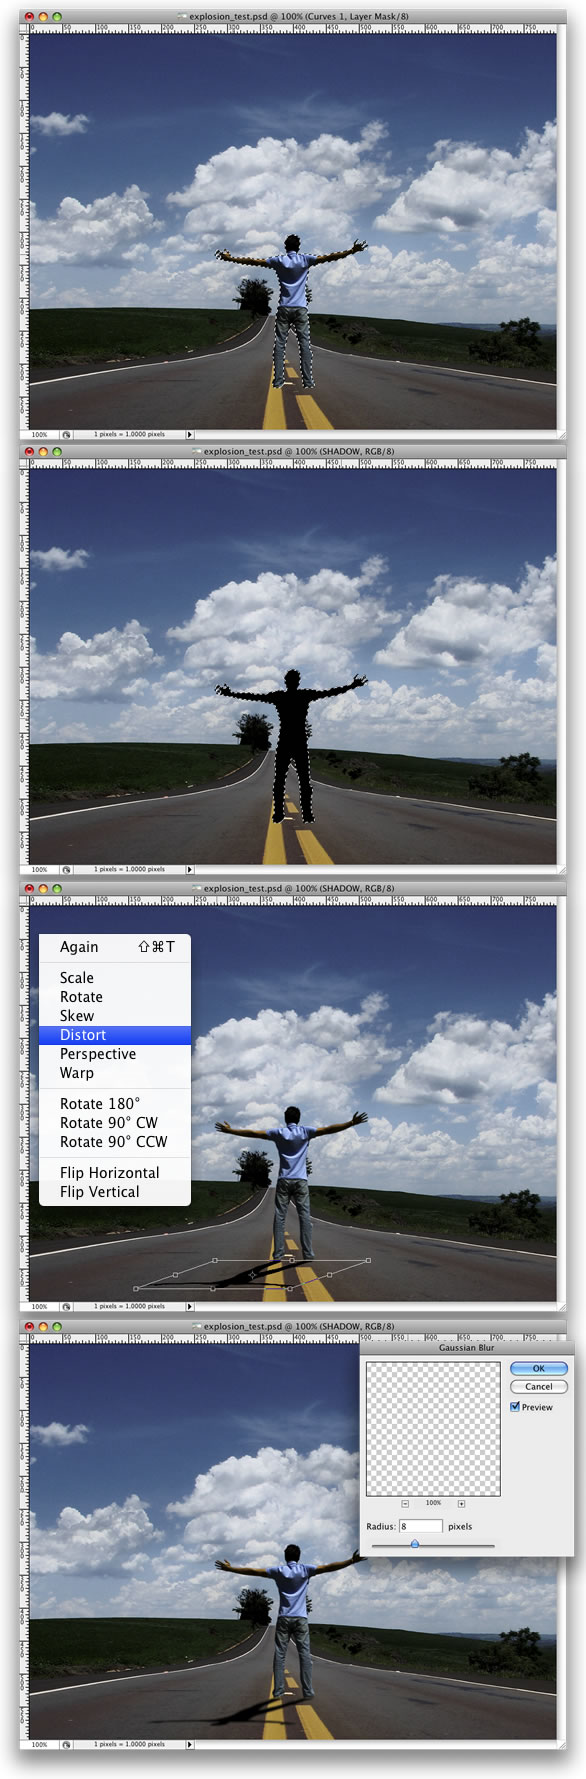
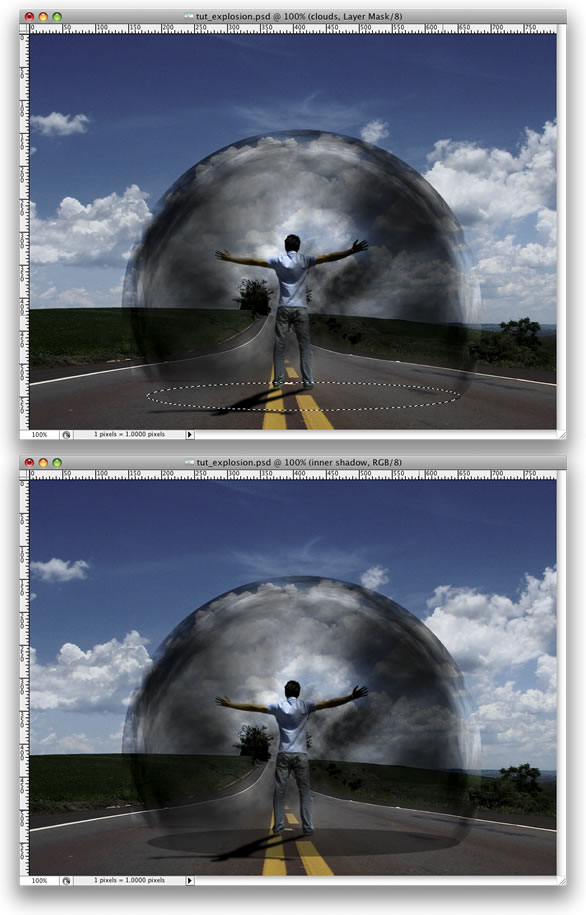
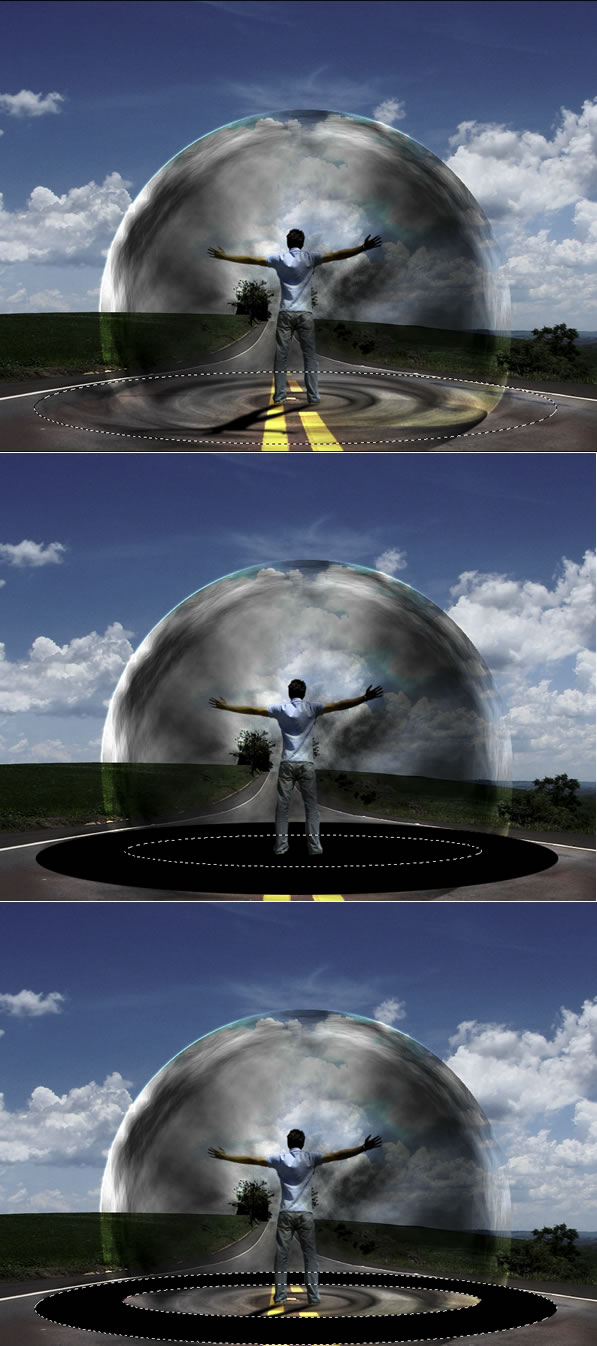
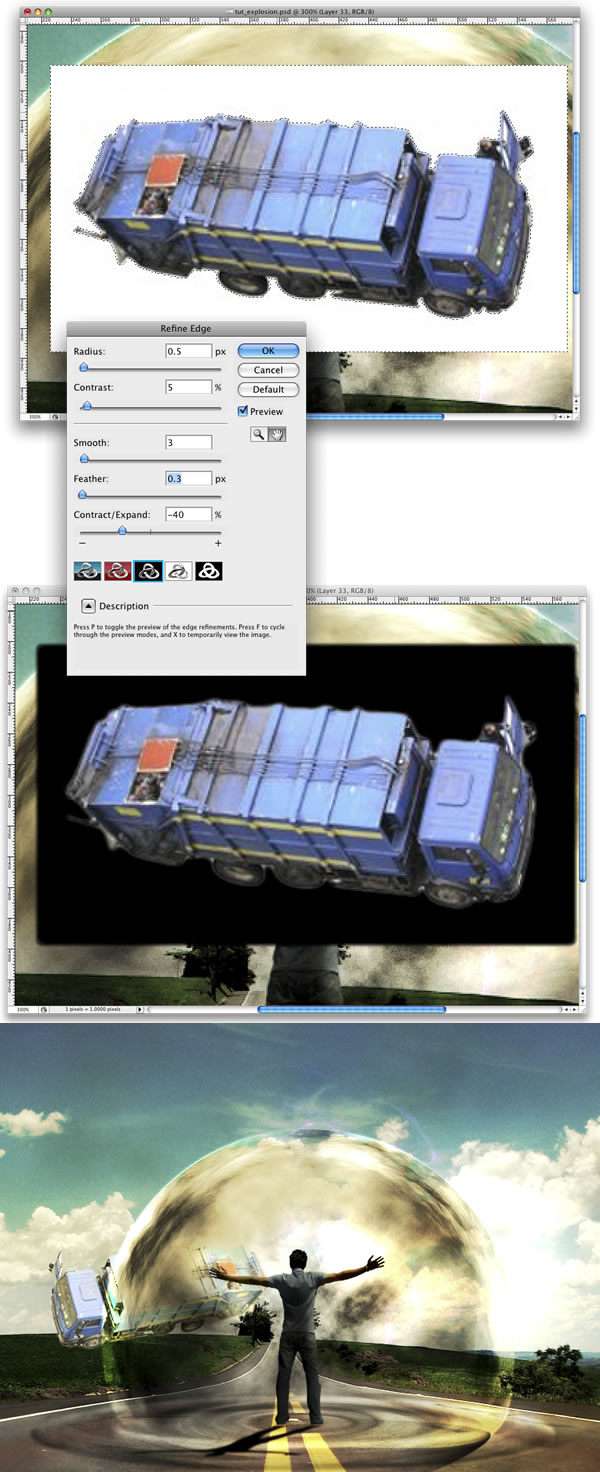
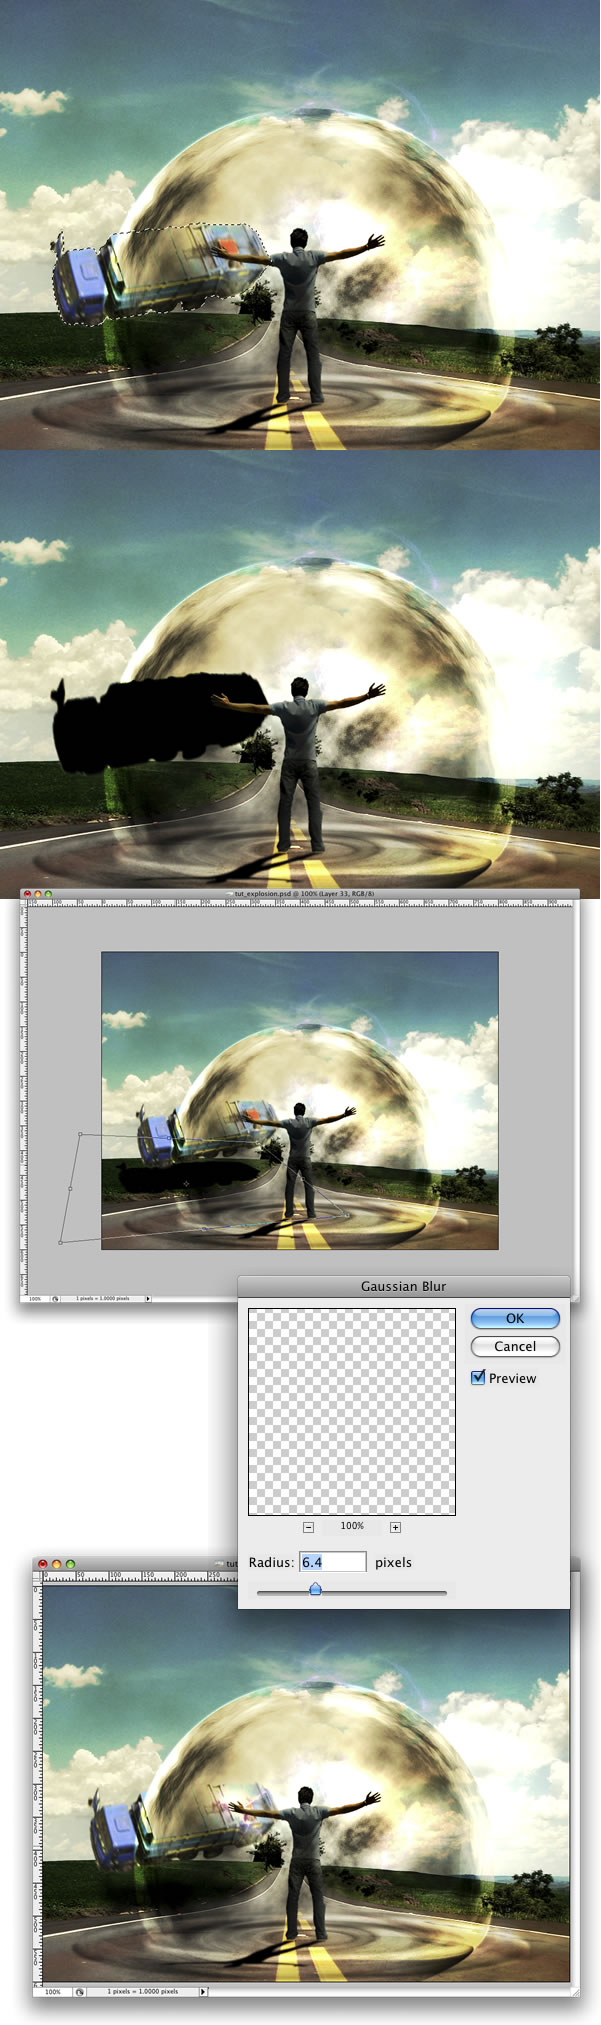
Mask/erase the parts of the path that are behind the legs/arms or whatever it is your paths follows.
08

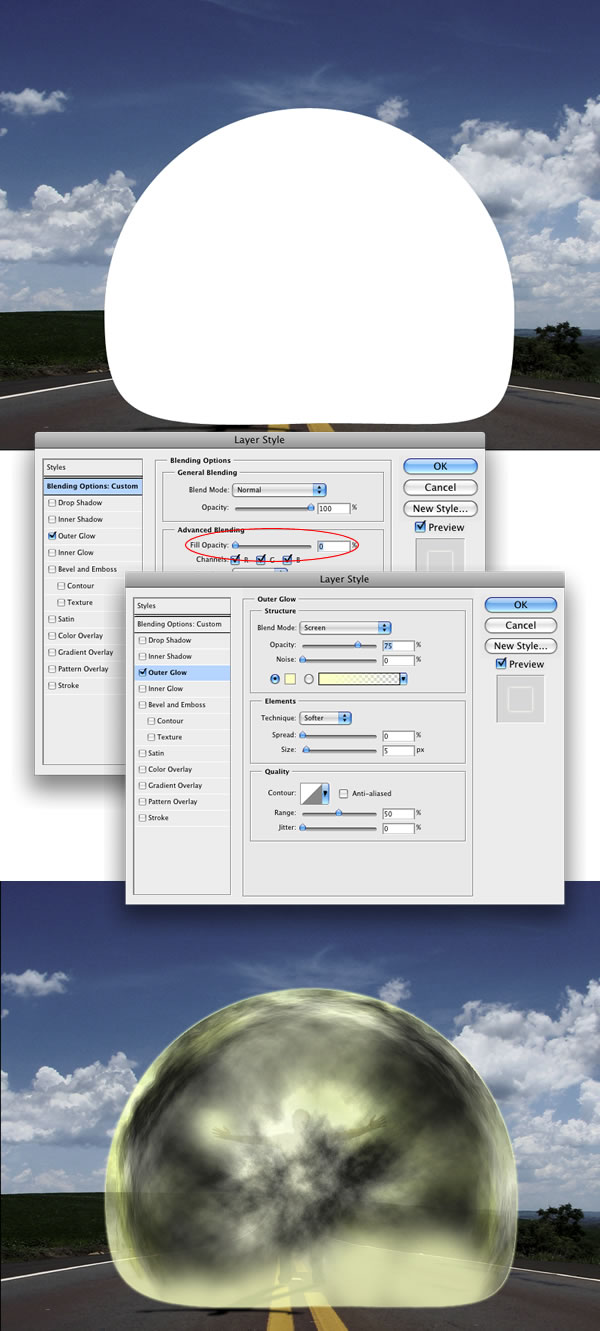
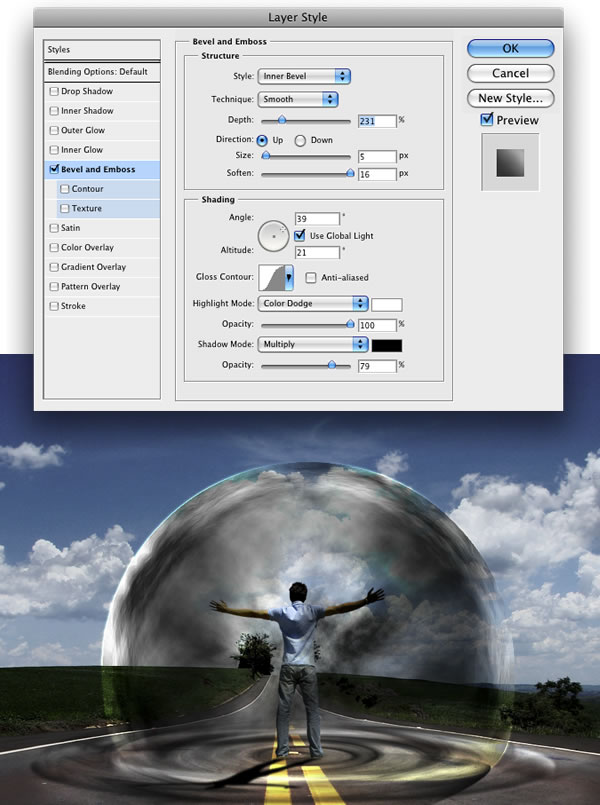
Right click on the Fire layer and select blending options, and use these options/values.
Feel free to play with the settings (that’s how i discovered this technique)
You might end up with something better!

09

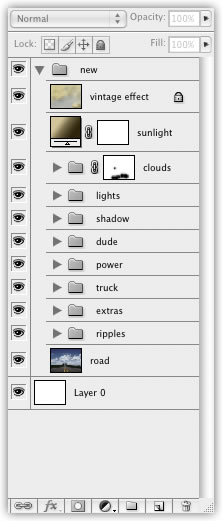
Duplicate the Fire layer, and set the layer mode to OVERLAY
Click the eye next to inner shadow and inner glow on the duplicate layer to deactivate them.

10

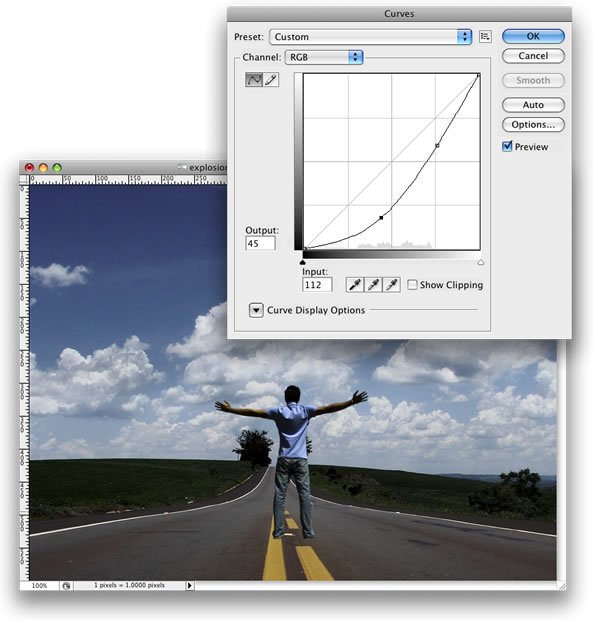
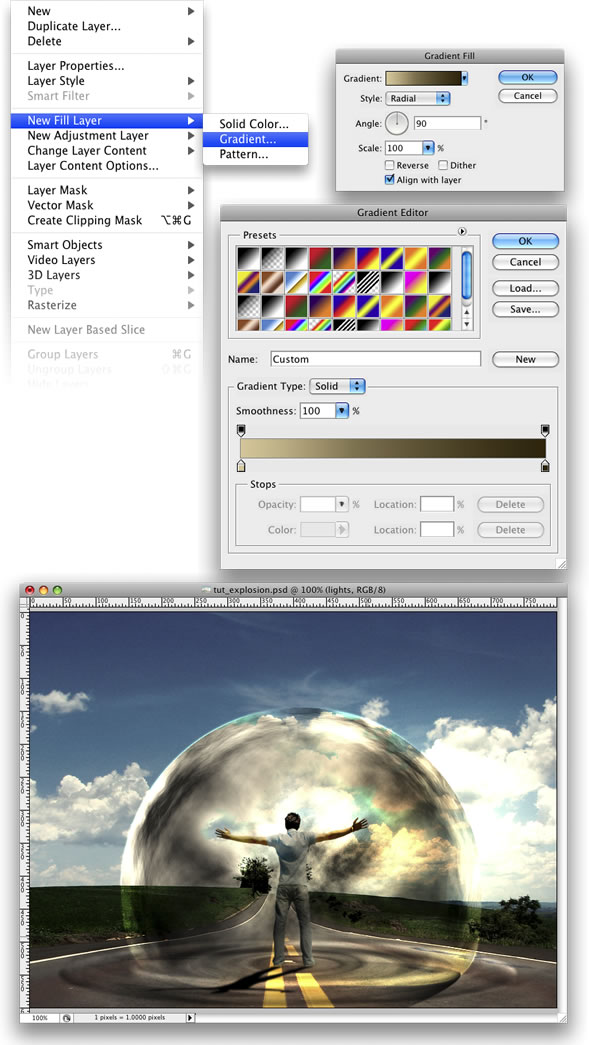
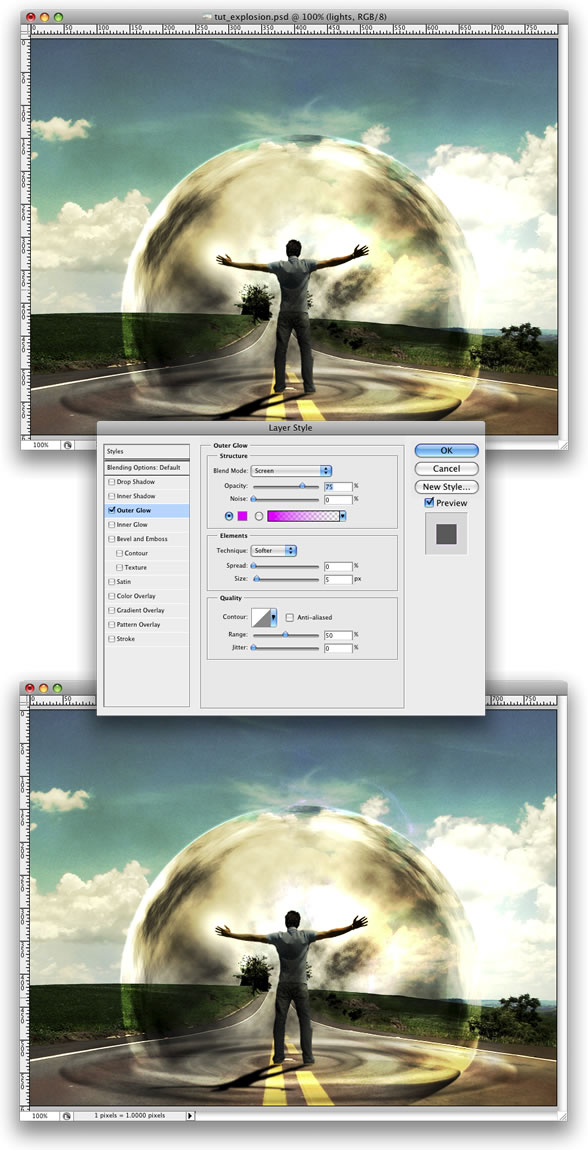
Now double click on outer glow on the duplicate and change the values to this.
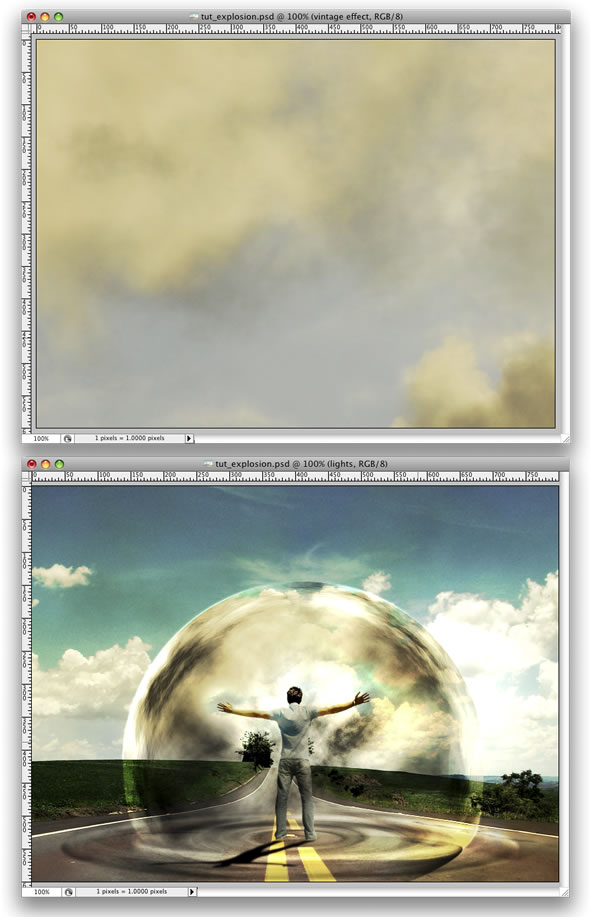
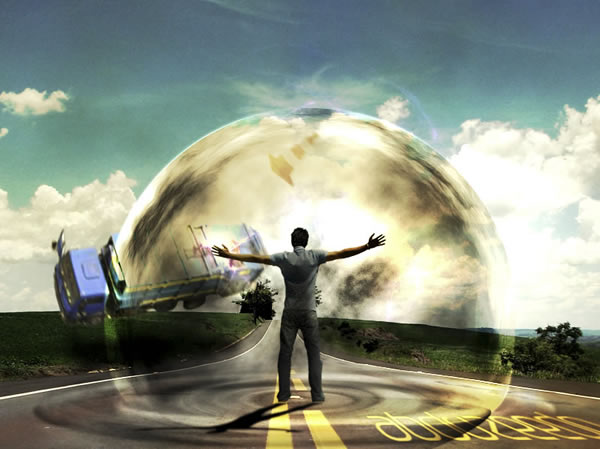
Conclusion

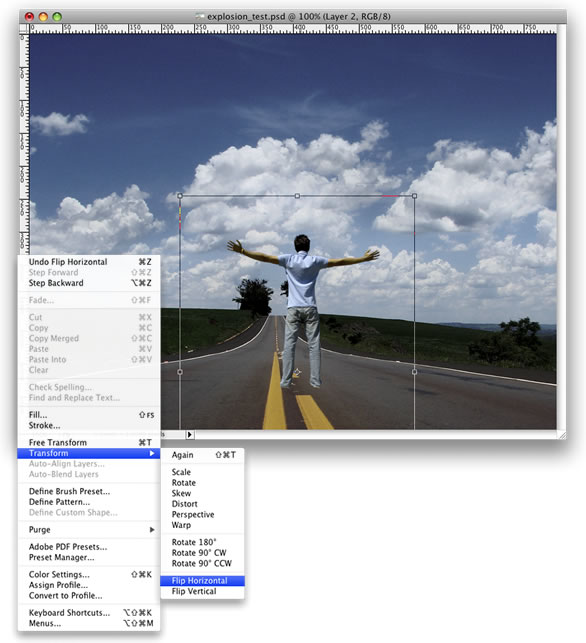
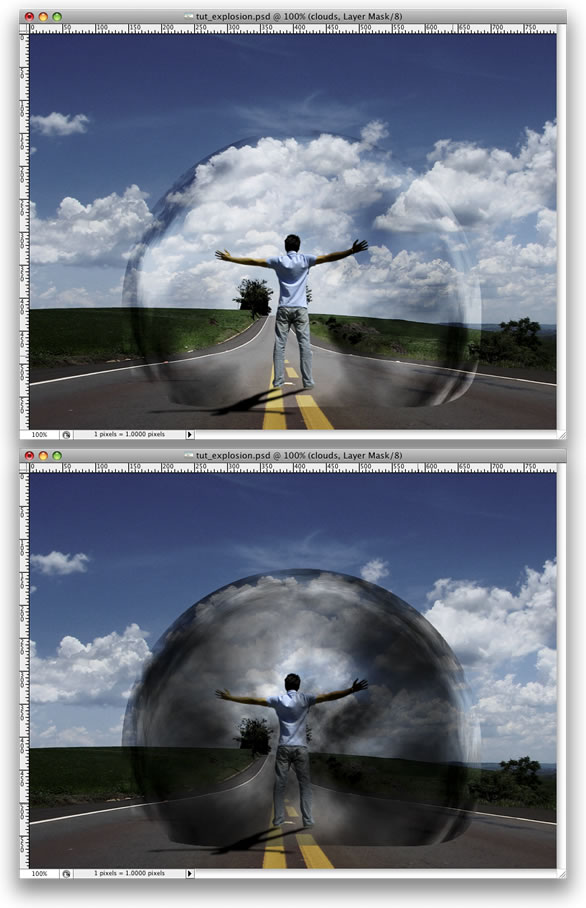
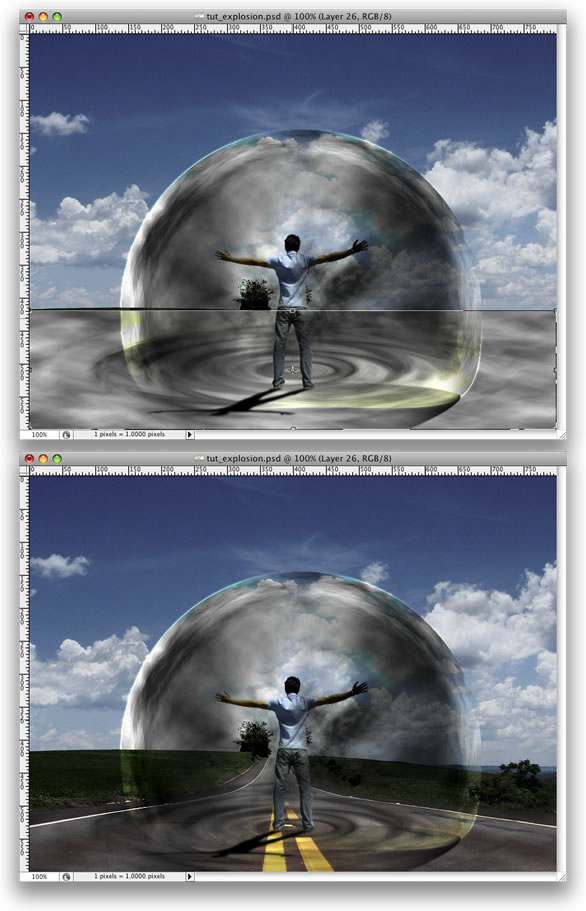
Spend a little time, and you can make something like what i have below…

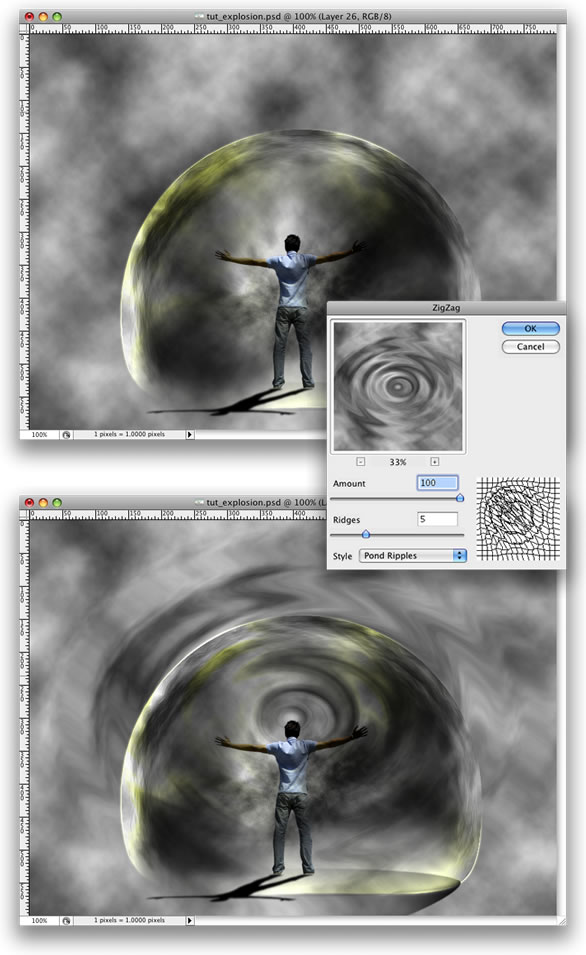
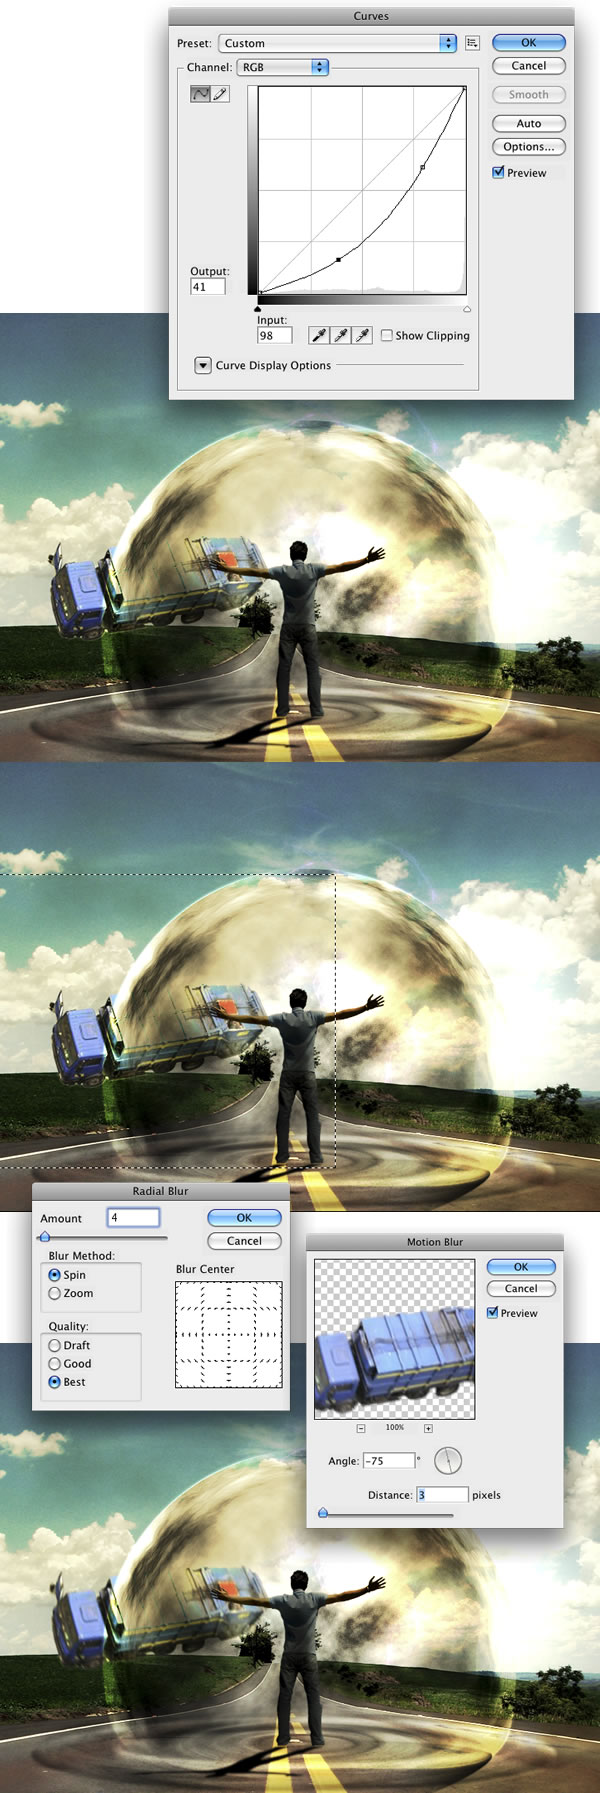
For a different effect, duplicate the FIRE layer again, and filter>distort>wave.
Play with the opacity levels, and play with the blending modes - particularly OVERLAY.
Good luck!
Sumber:www.thepirateschest.net

Light Streaks Effect and giving Prominence to Subject

This photo manipulation tutorial will cover three things like giving importance to the main subject, creating light streaks and a motion effect. The topic for this is Slam dunk Shot.

The final image

%photoshop Create Light Streaks Effect and giving Prominence to  Subject

This is the Stock photo which has been used to do this Tutorial. (Copyright belongs to respective owner)

%photoshop Create Light Streaks Effect and giving Prominence to  Subject

Select Caron’s picture alone carefully by using pen tool or lasso tool.

Copy the area and paste it as a new layer.

%photoshop Create Light Streaks Effect and giving Prominence to  Subject

Change the level (Ctrl+L) as below so the subject get more highlighted.

%photoshop Create Light Streaks Effect and giving Prominence to  Subject

Go to Layer blending options and Add an Outer Glow with following settings.

A greenish-yellow color has been used here as glow #b4ff00.

%photoshop Create Light Streaks Effect and giving Prominence to  Subject

Now select the whole background layer leaving the basket area.

%photoshop Create Light Streaks Effect and giving Prominence to  Subject

Apply Gaussian Blur to make the background “Out of Focus”. Our aim here is to make more prominence to the player who is doing the slam dunk.

%photoshop Create Light Streaks Effect and giving Prominence to  Subject

Now, The greenish – yellow glow we will hide till the last step to accurately work on the effects we are going to do.

Now go to the Caron layer and make 5 duplicates. On each layers we will be applying our settings, one by one.

%photoshop Create Light Streaks Effect and giving Prominence to  Subject

Lets start from the bottom most layer. Hide other 4 layers.

Go the the Filter Menu > Click on Stylize >Select the Wind. Change the default Method settings to Blast and the direction from Left.

%photoshop Create Light Streaks Effect and giving Prominence to  Subject

Keeping the same layer selected, now apply Motion Blur with following settings.

You can get it in Filter > Blur > Motion Blur.

%photoshop Create Light Streaks Effect and giving Prominence to  Subject

Goto the Layer Blending Options and apply Layer Style as Gradient Overlay.

By default you will get a Spectrum gradient. Select that and click OK to apply on the layer.

With the lasso tool select the area which precedes the Player. Hit the Delete Button to remove.

%photoshop Create Light Streaks Effect and giving Prominence to  Subject

Now remove from the leg area also like above . The results should be something like below.

%photoshop Create Light Streaks Effect and giving Prominence to  Subject

Now bring back (click the Eye icon on the layers panel) the 2nd layer of Caron.

Select the layer and apply transform (Ctrl+T) and rotate as shown below.

%photoshop Create Light Streaks Effect and giving Prominence to  Subject

Change the layer Opacity in the Layers Panel to 50%.

%photoshop Create Light Streaks Effect and giving Prominence to  Subject

Use the same as above to Rotate. Change the Opacity to 25%.

%photoshop Create Light Streaks Effect and giving Prominence to  Subject

Now we are moving to next level of giving some glow to the subject.

With the pen (P) tool, draw a line spiral line like below. We will be applying strokes on that.

%photoshop Create Light Streaks Effect and giving Prominence to  Subject

Make a new Brush with 4 equal ellipse. Change the Brushes settings in the menu as below.

%photoshop Create Light Streaks Effect and giving Prominence to  Subject

Make a new layer . Select the Brush. Apply Brush strokes on the path .

%photoshop Create Light Streaks Effect and giving Prominence to  Subject

%photoshop Create Light Streaks Effect and giving Prominence to  Subject

From the Filter Menu, apply Radial Blur with the below said settings.

%photoshop Create Light Streaks Effect and giving Prominence to  Subject

Lets Apply some custom gradient, as we applied on the wind layer above.

First color is #f707fe , Middle one#60fffe and the Last one#f1fc00.

%photoshop Create Light Streaks Effect and giving Prominence to  Subject

To make the light streak twist along the body erase some area of the streak as shown below. Use eraser for removing the area.

%photoshop Create Light Streaks Effect and giving Prominence to  Subject

From the Filters Menu > go to Render > Lens Flare.

Change the settings to Movie Prime.

%photoshop Create Light Streaks Effect and giving Prominence to  Subject

Now apply the greenish- yellow glow effect.

Our final result will be like this.

Hope You enjoyed and try it.

Thanks

%photoshop Create Light Streaks Effect and giving Prominence to  Subject

Sumber:psdguides.com

Powerful Mental Wave Explosion Effect

In this tutorial, I will show you how to create a crazy explosion, like a mix of Magneto’s ability with Peter Petrelli’s power. We will use images and filters to produce this wave explosion effect. Even though it may look like a difficult tutorial, it’s really not that hard.


Step 1

Open a new document. I used 800×600px. Look for a road photo on the Internet. The one I used can be downloaded here. After downloading, place the photo in your document.

Step 1

Step 2

Now we need a photo of a person. The one I used can be found here. Once you have your photo, it’s time to extract the guy from the background. Using the Pen Tool(P) create a path like in the image below. After that go to the Paths Palette and create a selection from that path. Then go to Layer>Layer Mask>Reveal Selection. Lastly, I named this layer “dude.”

Step 2

Step 3

Go to Edit>Transform>Scale and reduce the size of the guy. Then go to Edit>Transform>Flip Horizontal. We do that to match the light direction.

Step 3

Step 4

Go to Image>Adjustments>Curves. The idea here is to darken the guy a little bit so he will fit better with the background. Use the image below as a reference.

Step 4

Step 5

Holding Cmd/Ctrl click on the mask thumb of the “dude” layer. That will create a marquee selection of the guy. After that create a new layer. Rename it to “shadow” and fill it with black. Then go to Edit>Transform>Distort and move the vertices to make the shadow in perspective. The last thing here is go to Filter>Blur>Gaussian Blur.

Step 5

Step 6

Grab the Ellipse Tool(U). Select Paths instead of Shape Layer. Create a Circle, like the image below. After that grab the Direct Selection Tool(A) and adjust the bottom of the circle.

Step 6

Step 7

Create a new layer. Rename it to “clouds.” Then go to Filter>Render>Clouds. While holding Alt, click on Clouds. After that go to the Path’s Palette and create a selection from the path and mask the layer.

Tip: As you will be using the Render>Clouds, you will probably need to apply the filter several times until you got the clouds just right. Keep working with it until the light and dark areas are in a good position.

Step 7

Step 8

Go to Filter>Liquefy. In the Liquefy Dialog Box select the Bloat Tool (B). Then for the settings use: Brush Size 550, Brush Density 100, Brush Pressure 100, Brush Rate 60, and Turbulent Jitter 75.

Then select the Show Backdrop Option. That will allow you to see the clouds and the background. It will be necessary to use the Bloat Tool in the right place. Click a few times and deselect the Show Backdrop. Then you will see the effect and will be able to repeat it more times in the correct place.

Step 8

Step 9

Change the Blend Mode of the cloud layer to Soft Light. Then create another layer and rename it to “Clouds 2″ and repeat Steps 7 and 8. We will need another cloud to make it more turbulent. This time, however, use Multiply for the Blend Mode.

After that, create yet another layer. Rename it to “Clouds 3″ and repeat Steps 7 and 8. For this layer use Color Dodge for the Blend Mode. The last thing here is with the Eraser Tool (E) delete some parts. This layer is used to give highlights to the clouds.

Step 9

Step 10

Group the “Clouds 3″ layer and go to Layer>Layer Mask>Reveal All. After that, select the Brush Tool (B), give it a black color, and mask some parts of the clouds that are close to the ground.

Step 10

Step 11

Select the “Clouds” layer and go to Filter>Sharpen>Sharpen More. Then repeat this Sharpen filter on Clouds 2 and 3 layers.

Step 11

Step 12

Create a new layer. Rename it to “Glow.” Fill it with white and go to the Path Palette. Create a selection from the clouds path as we did in Step 9. Then mask the layer.

After that go to Layer>Layer Style>Outer Glow. Use the default settings. Then go to Layer>Layer Style>Create Layer. This command will create another layer from the Outer Glow. You can delete the white layer and leave just the Outer Glow layer.

Step 12

Step 13

Create a folder called “Lights.” Move the “Glow” layer to this folder. Next select the “Glow” layer. Then go to Layer>Layer Mask>Reveal All. Then select the Brush Tool, black for the color, and start masking the glow. We need just the outline; however, some bright spots in the middle will give a nice result.

Step 13

Step 14

Create a new layer beneath the clouds group. Using the Elliptical Marquee Tool create a selection like the image below. Fill the layer with black and use 40% Opacity.

Step 14

Step 15

Go to Layer>Layer Mask>Reveal All. After that select the Gradient Tool(G) and use a black and white gradient. Then mask the layer, like in the image below.

Step 15

Step 16

Duplicate the layer and go to Layer>Layer Mask>Apply. Then go to Edit>Transform>Distort. Repeat the same thing we did for the shadow of the guy on this layer. Group these two layers and rename the group to “Shadows.”

Step 16

Step 17

Create a new layer right above the road photo. Go to Filter>Render>Clouds. Then go to Filter>Distort>ZigZag. Use 100 for the Amount and 5 for the Ridges. For the Style use Pond Ripples.

Step 17

Step 18

Now go to Edit>Transform>Distort. Distort the layer until you get the right perspective. After that, change the Blend Mode to Overlay. Again, as we are using Render Clouds, the results may vary so you might need to erase some parts to make it more realistic.

Step 18

Step 19

Create an Elliptical Selection like the image below. Then fill it with black. After that, create another Elliptical Selection, but smaller. Then delete that part of the layer. With the Magic Wand Tool(W) select the black part of the layer.

Step 19

Step 20

Duplicate the road’s layer and select it. Make sure that you still have the Marquee Selection from the Step 19. Then go to Layer>Layer Mask>Reveal Selection. You can delete the black ellipse layer from the Step 19 or just hide it.

Go to Layer>Layer Styles>Bevel and Emboss. This is another way to create the ripple effect. You could use Displace as well.

Step 20

Step 21

Go to Layer>New Layer Fill>Gradient. Use Radial for the Style. For the colors use #ddc396 and #2f1e00. Change the Blend mode to Color Dodge.

Step 21

Step 22

Here I used another image from Stock.Xchng, image. Just place it on top of all layers and change the Blend Mode to Overlay.

Step 22

Step 23

Now let’s make some adjustments. First, lets darken our Magneto dude a bit more. Select the Burn Tool(S) and burn the back of the guy. After that, change the Blend Mode of the “ripples” layer to Soft Light. You can delete some parts of the clouds as well.

Step 23

Step 24

Create a new folder, beneath the “dude” layer. Name the group “power” and change the Blend Mode to Color Dodge. After that, create a new layer inside of this group. Then using the Brush Tool with white color, create some lights coming from the hands of the guy. Tip: use a regular brush with 0% for the hardness.

After that you create another layer. Use some brushes to add more effects. I used some abstract brushes from http://brusheezy.com. Then add a Pink Outer Glow Layer Style.

Step 24

Step 25

Import the truck image, you can download it at image. Then with the Magic Wand Tool(W) select and delete the background of the photo. Leave just the truck. After that go to Edit>Transform>Flip Horizontal. Move the truck to the side of the road.

Step 25

Step 26

Go to Image>Adjustments>Curves and make the truck a bit darker. After that, using the Rectangular Marquee Tool(M), create a rectangular selection a bit bigger than the truck. Then go to Filter>Blur>Radial Blur. For the settings use Amount 2, Method use Spin, and set Best Quality. Next go to Filter>Blur>Motion Blur. Then use -75 degrees for the angle and 3 pixels for the Distance.

Step 26

Step 27

Now we will create the truck’s shadow. To do that select the Truck’s layer, click with the right button of the mouse and choose Select Pixels. Then create a new layer and fill it with black. Put this layer beneath the truck layer and go to Edit>Transform>Distort. Distort the shadow to make it look more real. Then go to Filter>Blur>Gaussian Blur. Change the Opacity of this layer to 60%.

Step 27

Step 28

Group the truck and the shadow layer and rename it to “truck.” Then organize your folders in the Layers Palette.

Step 28

Conclusion

You can add more elements to the image, like a traffic cone or more cars. But always change the curves in order to make the objects have the same lighting. That will make the image more realistic. For some effects, there will be many other ways to achieve a similar result. Experiment with different methods of achieving an effect, like we did with the ripples. Finally, stick with the ones you think are the best for that image.

Conclusion
Sumber:psd.tutsplus.com